YOUVI Logic Module
The logic module for the YOUVI Basic software package enables the definition of routines in the KNX Smart Home. The building thinks with you and many manual operations can be reduced. Individual notifications about specific events are also possible. With the KNX Logic Module, Smart Home residents not only save time, but also energy, for example when the heating is regulated automatically.
Please note: The YOUVI Logic Module can only be used in combination with YOUVI Basic and PEAKnx hardware. You can find out where to find the YOUVI hardware key in the "Installation" tab.
YOUVI Basic: The intelligent software solution for KNX smart home control
YOUVI Basic combines visualisation, IP router and bus monitor in one package. With the additionally available modules and bridges, the Smart Home functions can be expanded as required.
Create smart home logics: What if?
The logic module is the core of an automated building. YOUVI reacts to defined events and makes intelligent home control possible. With the logic editor, the user can easily create routines himself. Each routine consists of trigger, action and, if necessary, one or more condition(s). This means, for example, that the irrigation system in the garden can automatically supply the lawn when the soil moisture drops below a certain level or the roller shutters can be automatically lowered at sunset. Through various custom states, the user himself determines when routines are played or deactivated. For example, a number of routines can be stored that simulate presence and are only activated during vacation. During the absence, the logic module can create a small log by displaying notifications in the visualisation when certain events occur, for example when the motion detector in the garden is activated.
Create KNX logics intuitively yourself
The easiest way to set up the module is in the browser on your laptop. YOUVI presents the logics in a tabular overview. Each routine can also be assigned suitable labels to better structure the view and to find routines quickly. Routines can be created directly after the installation of the module without further settings. The user interface is easy to understand for everyone and allows to create simple logics in no time.
Combined with the Controlmicro's coloured LEDs, sensor values can be displayed in different colours - a simple information with a signalling effect. Various scenarios can thus be implemented:
Signal colour or traffic light system Depending on the integrated sensors and routines, you can use the LEDs as a warning by lighting them up in a signal colour in certain situations. Alternatively, you can, for example, create a traffic light system to visually show the current value: Set three ranges and have the Controlmicro light up in green, yellow, or red depending on the current value.
Photovoltaic system Keep an eye on the power produced: If the power produced rises above a predefined threshold, the LEDs on the Controlmicro turn green. At a glance you see whether the current production is sufficient to turn on the washing machine, for example. In addition, you can also create a traffic light system for the generated power in the logic module. Exact values are shown in the visualisation or in the mobile app.
Rain gauge If you use a rain gauge, it is also possible to have the Controlmicro light up in red, for example, when a predefined limit is exceeded, and you should check if there is water in the cellar.
Open window If you have equipped your windows with certain window contacts, this signal can also be included in a logic routine. Thus, you can see directly via the Controlmicro LEDs when a window in the house is open.
Air humidity In this scenario, the Controlmicro lights up in a signal colour when your air humidity sensor in the cellar exceeds a threshold value.
- Http command
- KNX telegram
- Device value (sensors, shading, light, switches, heating, ventilation)
- Timer
- Interval
- Sunrise/set
- Custom states
- Door station: doorbell rings
- ISE Remote Connect: Access to portal, access for installers, access for residents, remote access or Quick Connect allowed/denied
- Define one or more actions
- Define a delay for each action
- Device value (shading, light, switches, heating, ventilation)
- Sound system: mute/unmute, volume, playlists/favourites, pause
- Door station: Mute/unmute on specific client
- Camera: Camera image is brought to the foreground in the visualisation
- ISE Remote Connect: allow/deny access to the portal, access for installers, access for residents, remote access or Quick Connect
- KNX telegram
- Http command, methods: GET, PUT, POST, DELETE
- Custom states
- Set theme of visualisation of a specific panel, the YOUVI Mobile App or all clients to light/dark
- Notification in visualisation (toast or popup)
- Sending Push notifications to the mobile app (in combination with YOUVI Connect)
- Email notification
- Starting scenes
- Create several conditions and link them with "AND" or "OR" operator
- Time period
- Day/night
- Device value <, >, =, ≠ Threshold x (sensors, shading, light, switches, heating, ventilation)
- ISE Remote Connect: access to portal, access for installers, access for residents, remote access or Quick Connect allowed/denied
- Custom states
Hardware and software requirements
The YOUVI Logic module can only be used in conjunction with YOUVI Basic and PEAKnx hardware (Control 12, Controlpro, USB-Connector or Performance Server).
Installing the Logic Module
- First perform the following steps in YOUVI:
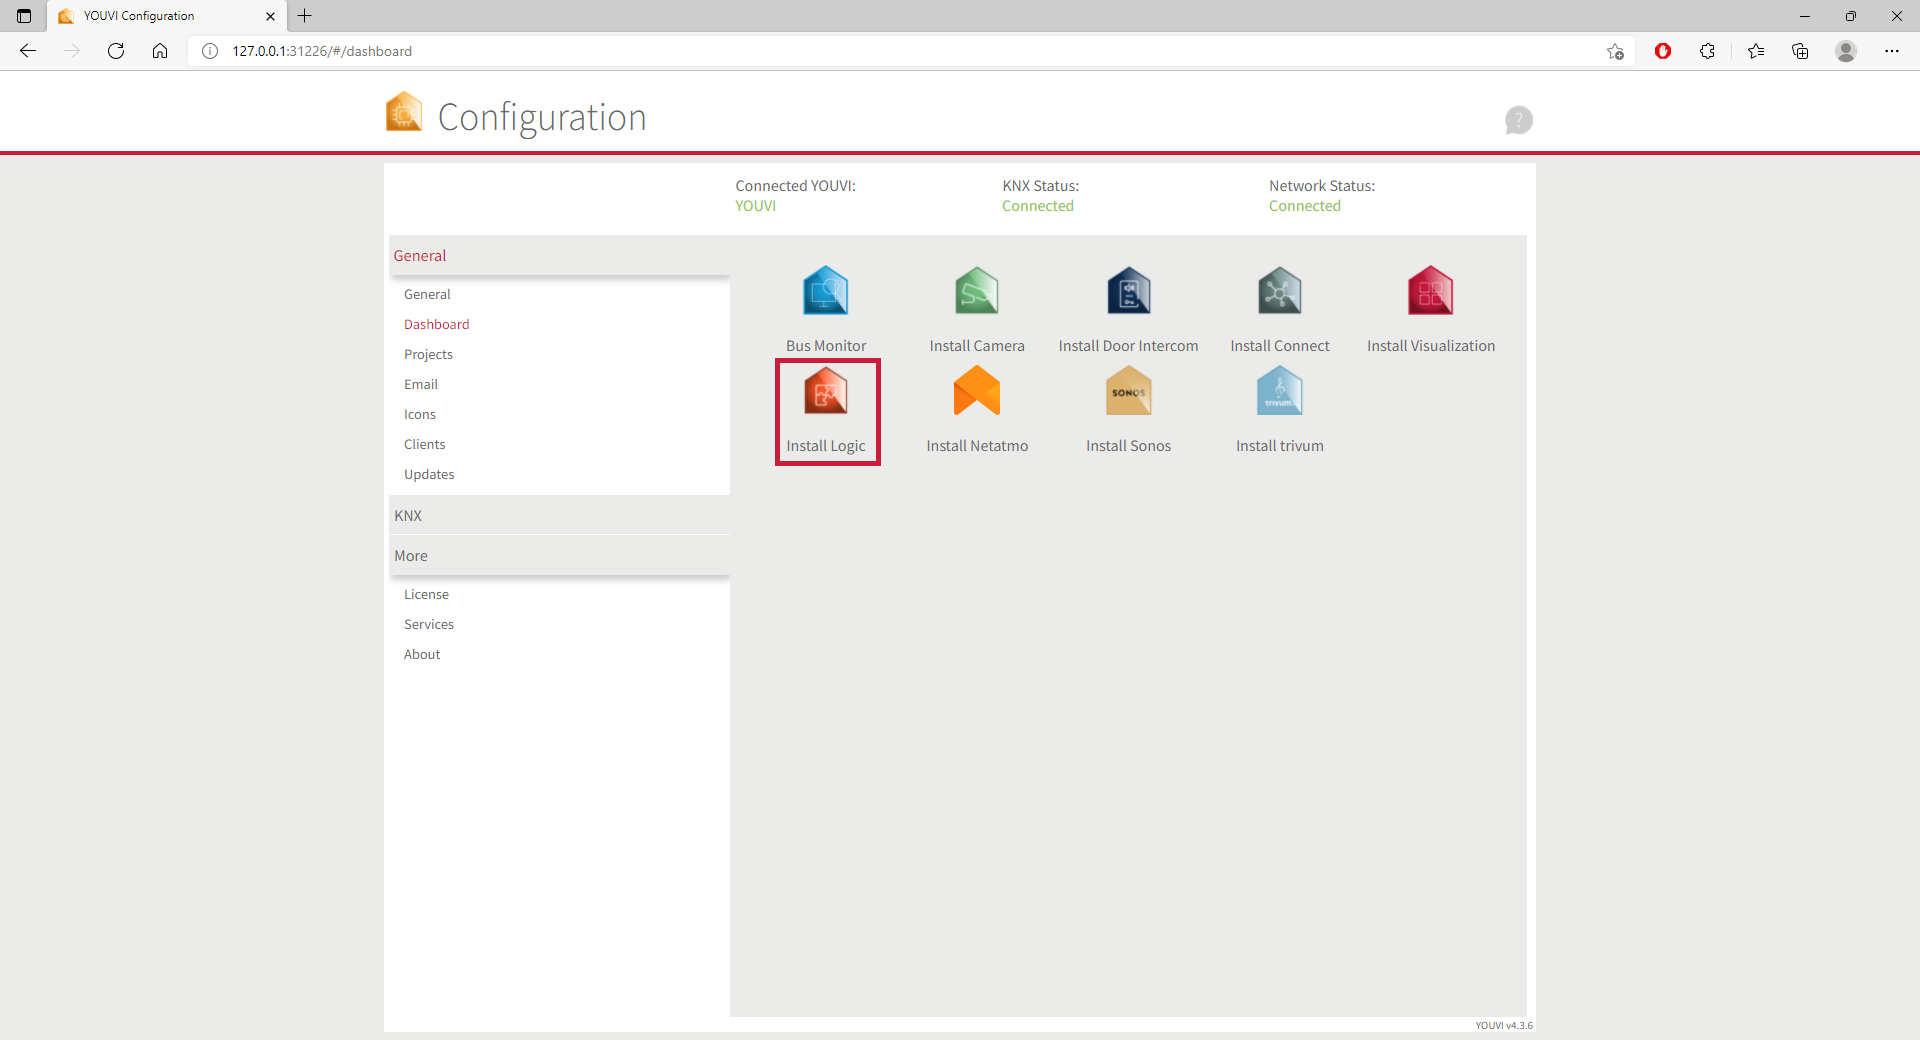
- If the desired module/bridge has not yet been installed, do it now via YOUVI Dashboard. In case of the YOUVI Logic Module, click on "Install Logic".

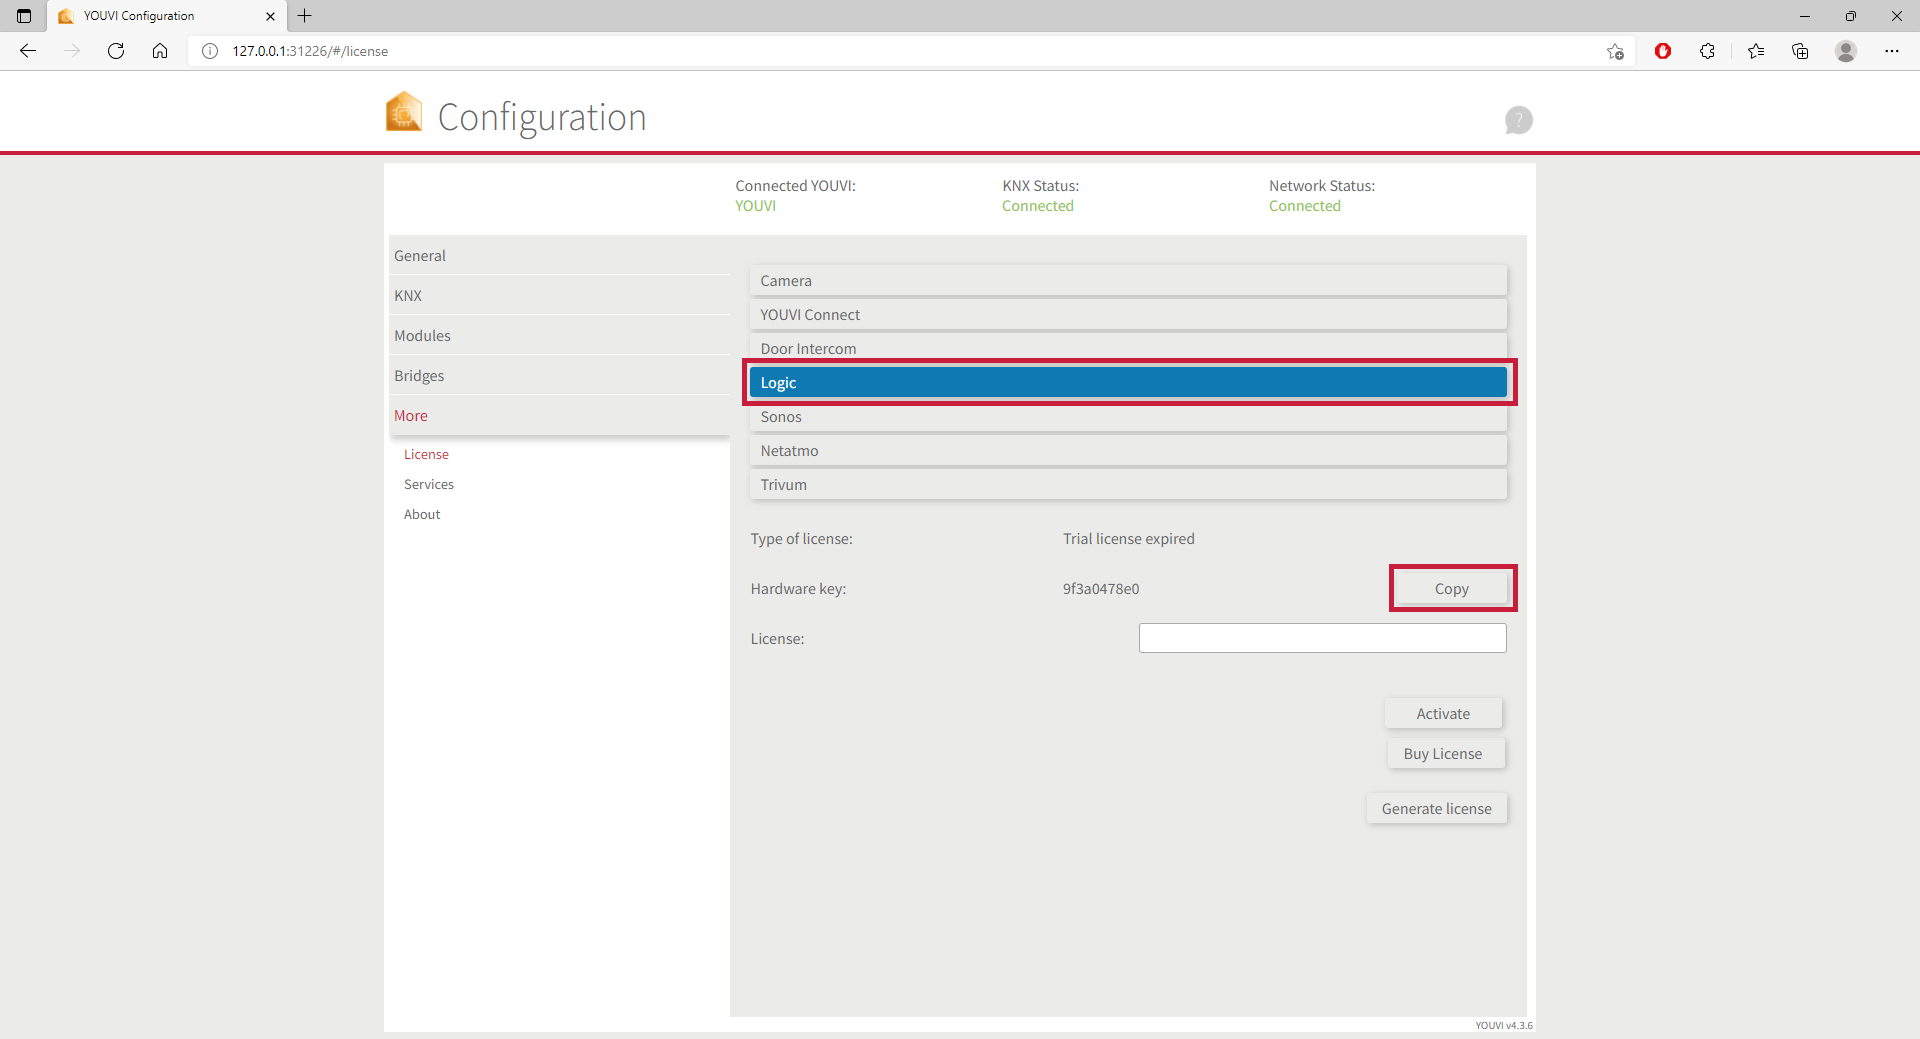
- Then open YOUVI Configuration > More > License and select the appropriate license for the module/bridge.
- Copy the hardware key.

- Then carry out the following steps in the PEAKnx Shop:
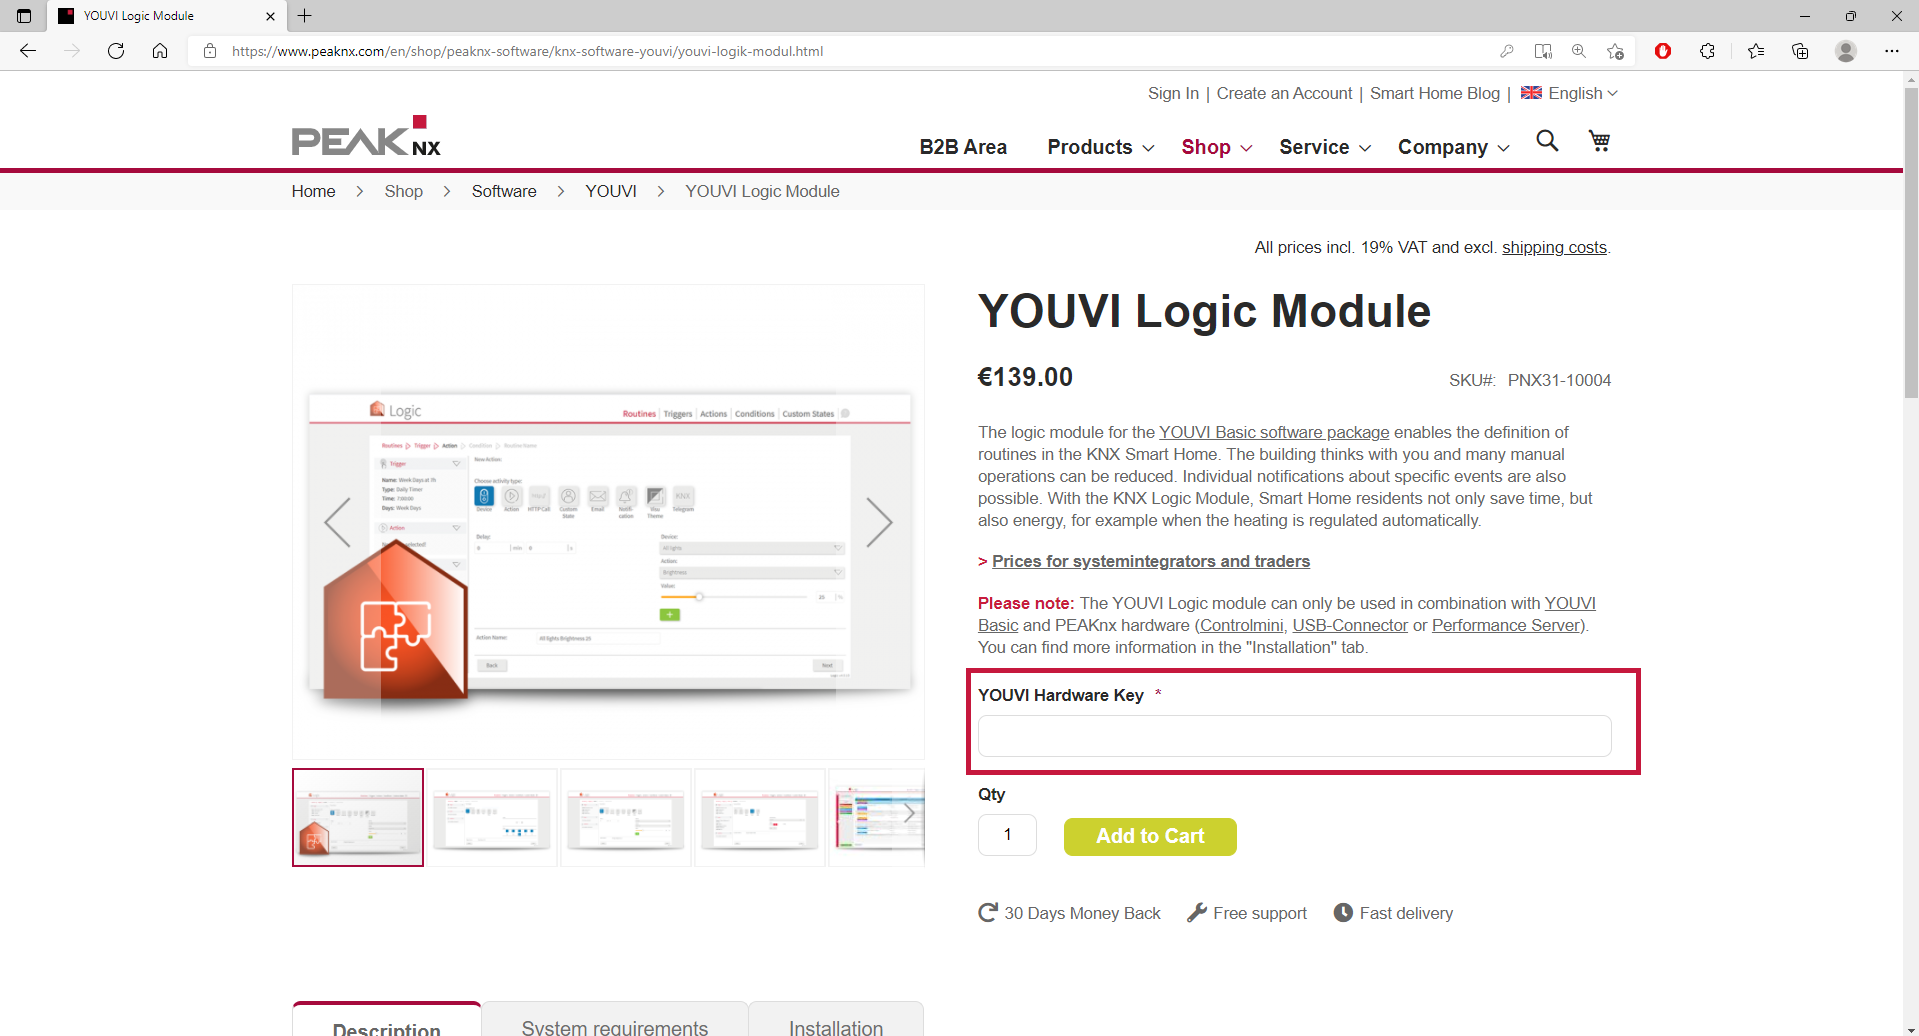
- Enter the copied code under "Hardware Key". A license key will be generated and stored from it in the following.

- After completing the order process and paying the invoice, you can take the license key from your customer account. In the tab "My license keys" you will find all purchased license keys.
- Return to YOUVI:
- Open YOUVI Configuration > More > License and select the appropriate license for the module/bridge.
- Enter the license key under the "License" field and select "Activate".


